For users to access the CRM module, they need both the CRM license and the main CRM user permission. Other CRM-related user permissions are also available to control the actions a user can take within CRM. CRM user restrictions control the type of CRM-related data the user can access.
CRM license
The ability to assign a CRM license to someone depends on the number of licenses that are available for your Phocas site. You can assign the license in three ways.
Click the Phocas menu button > Administration > Users to open the Users screen, then use one of these methods to assign the license:
Assign the license to an individual user:
On the user’s maintenance form > User tab > License section, set CRM to Yes and click Save. While you are here, you can proceed to assign the CRM permission (see below).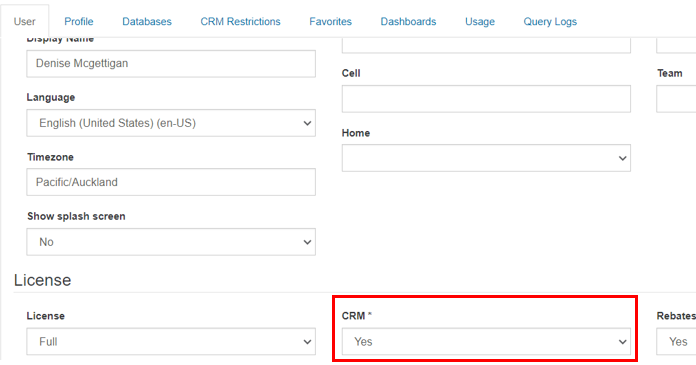
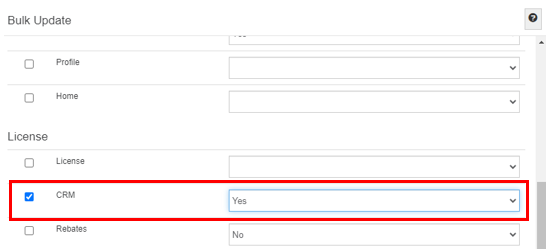
Assign the license to multiple users at the same time:
On the main Users screen, either use one of these methods:Switch to License view, select the CRM checkbox for the applicable users, then click Save.

Select the applicable users and click More > Bulk Update, then select Yes from the CRM dropdown list and continue with the bulk update.
CRM permissions
The CRM user permissions govern access to the CRM module and the actions users can take there.
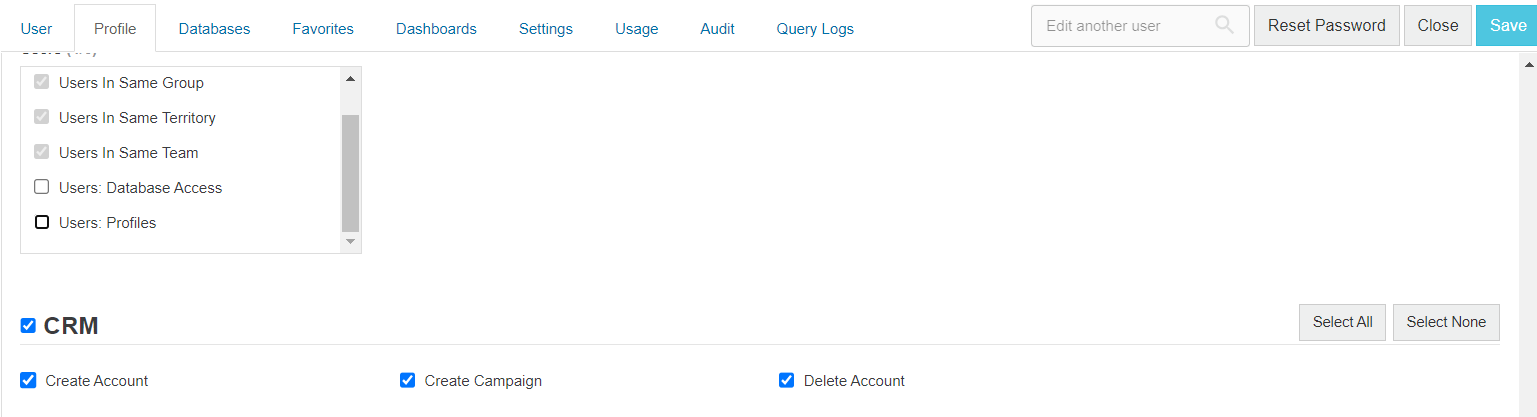
CRM (main permission) - Access the CRM module, view and update the accounts and contacts, and add and delete activities.
Create Account - Create new accounts.
Create Campaign - Manage campaigns.
Delete Account - Delete accounts.
On the user’s maintenance form > Profile tab, either assign a profile that contains the CRM permissions or go to the CRM section (near the bottom of the screen) and select the required CRM permission checkboxes. Then click Save.

CRM restrictions
Rules-based CRM user restrictions are the primary method of determining what determine what CRM entities (accounts, contacts, leads, and activities) a CRM user can view or edit. As an administrator, you can assign users to teams, groups, and territories for ease of to help you with user management, but it is the restrictions that determine what the these settings are also used in CRM restrictions to determine what CRM entities each user can view and edit.
The basic principles of the CRM restrictions are:
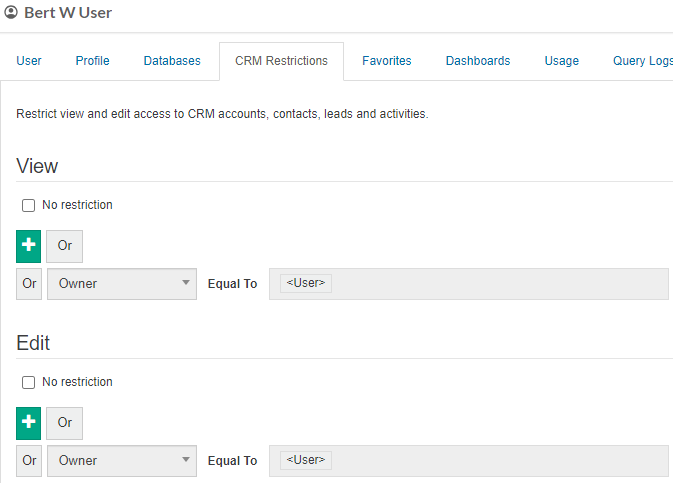
You can always view and edit anything you own. the entities you own. In the following image, you can see the default rule is Owner Equal To <User>, which means that the user (Bert) is restricted from viewing and editing all CRM entities except for those he owns.
If you have edit access to an account (or lead), you can edit the entities associated with that account. For example, if your restrictions allow you to edit an account (the parent), you can also edit that account's activities and contacts, and even the contact's activities (the children).
Similarly, if you have view access to an account, you can view its entities.
Campaigns can be viewed by all users, regardless of restrictionrestrictions.
You can view and/or edit other CRM entities if you are linked to the owner of those entities via a restriction rule (as explained in the next section).
Add restrictions
You enable users to view and edit more CRM data. For example, in the image below, the user Bert can view entities where the owner is either himself or his colleague Jill. This is because the placeholder <User> is populated by default, and the administrator has added Jill's name into the rule. This is a very basic example, and it would be more common to add additional criteria such as territory, team, and so on.

Open the user’s maintenance form and click the CRM restrictions tab.
In the View and/or Edit section, manage the user’s CRM restrictions as required:
(Optional) Remove all restrictions and therefore, give the user full access to the data in CRM: Select the No restriction checkbox. This action is suitable for administrators and users who require a broad level of access, as they typically need to view and edit all CRM entities.
Add a new rule: Click the green plus
then set criteria against which to apply the rule, using And or Or conditions, along with the following placeholders, as required:
<User> is the user's ID.
<User's Territory> is the user's territory.
<User's Group> is the user's group.
<User's Team> is the user's team.
Click Save.
| title | View an example of setting view and edit restrictions |
|---|
entities (not just the ones they own) by adding restriction rules that link them to those entities. There are two models for adding restriction rules.
Use single values (static)
Add specific users, groups, territories, and/or teams to a restriction rule, one at a time.
This model is suitable for small organizations that typically have a flat hierarchy or only a few users because:
When circumstances change, you need to update the restriction rule for each user manually.
It can be difficult to understand who can access what, as the Users page only lists each user’s group, territory, and team, not any others to which they have been linked via a restriction rule. You need to go into each user’s CRM Restrictions tab for such details.
| Expand | ||
|---|---|---|
| ||
Suppose you want Bert the sales executive to be able to view the CRM entities owned by his colleague Betty.
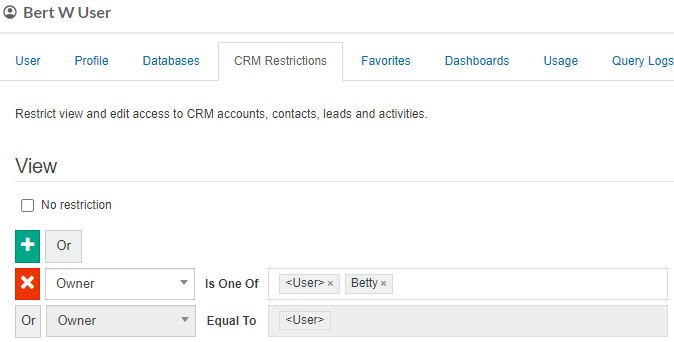 This is a very basic example; it would be more common to add additional criteria such as territory, team, and so on. |
| Expand | ||
|---|---|---|
| ||
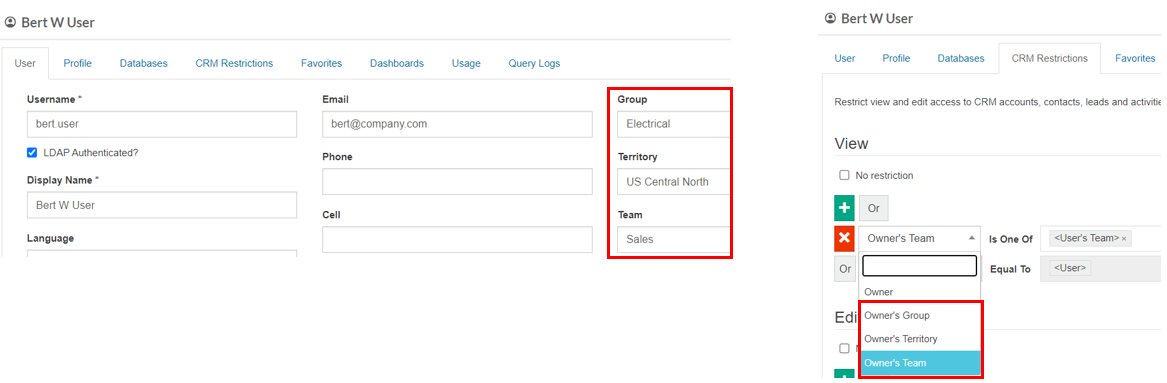
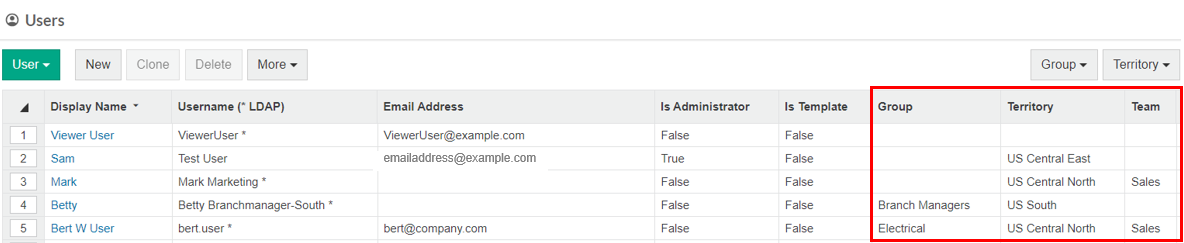
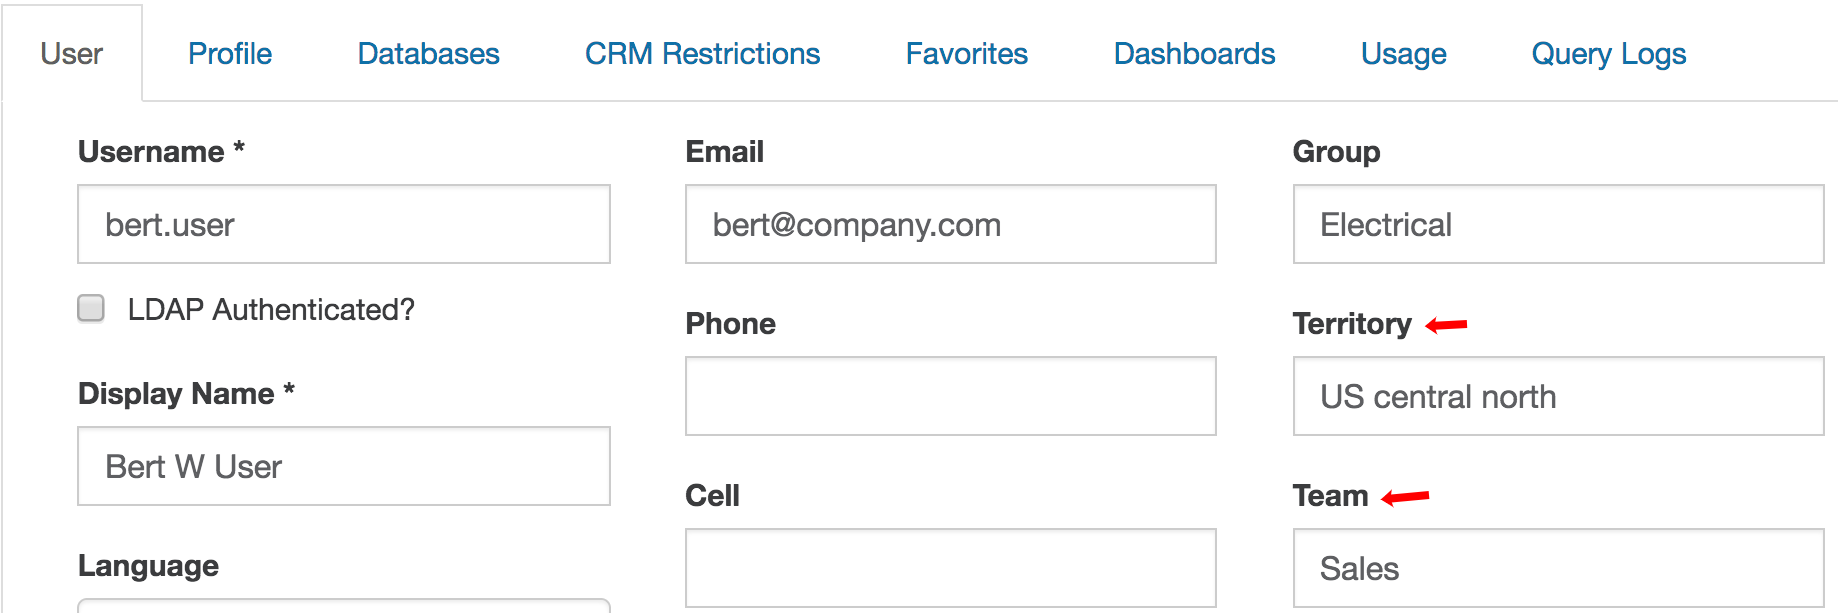
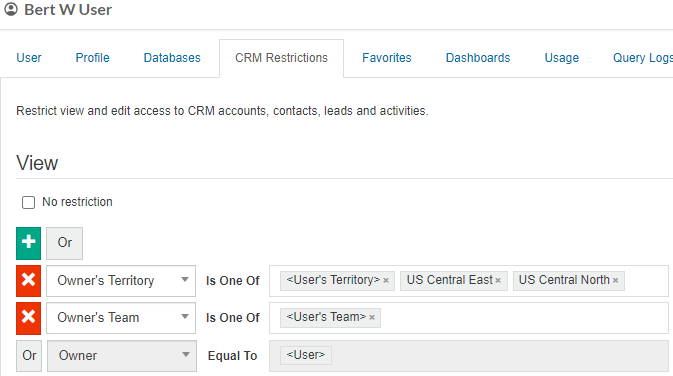
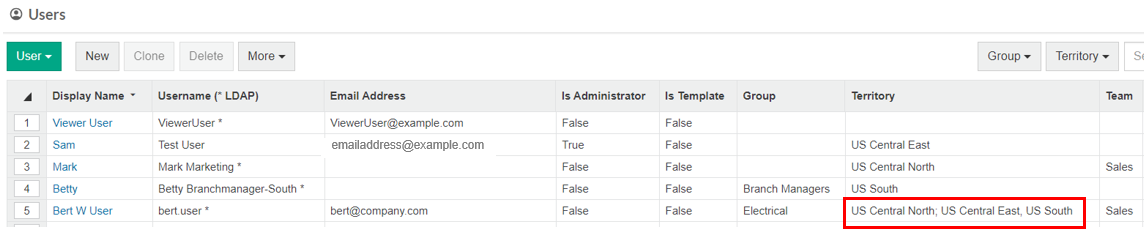
Suppose you want Bert the sales executive to be able to view and edit everything within his own team and territory. You also want him to be able to view entities within the neighboring territory (US Central East) but not edit anything relating to that territory. In Bert’s user maintenance form, you can see that he belongs to the US central north Central North territory and the Sales team. He also belongs to the Electrical group but you so do not want to use that group as the basis for any restrictions.  You want Bert to be able to view and edit everything within his own team and territory. You also want him to be able to view entities within the neighboring territory (US central east) but not edit anything relating to that territory. On Bert’s CRM Restrictions tab > View section, you set the restrictions as follows: | ||
View | Edit |


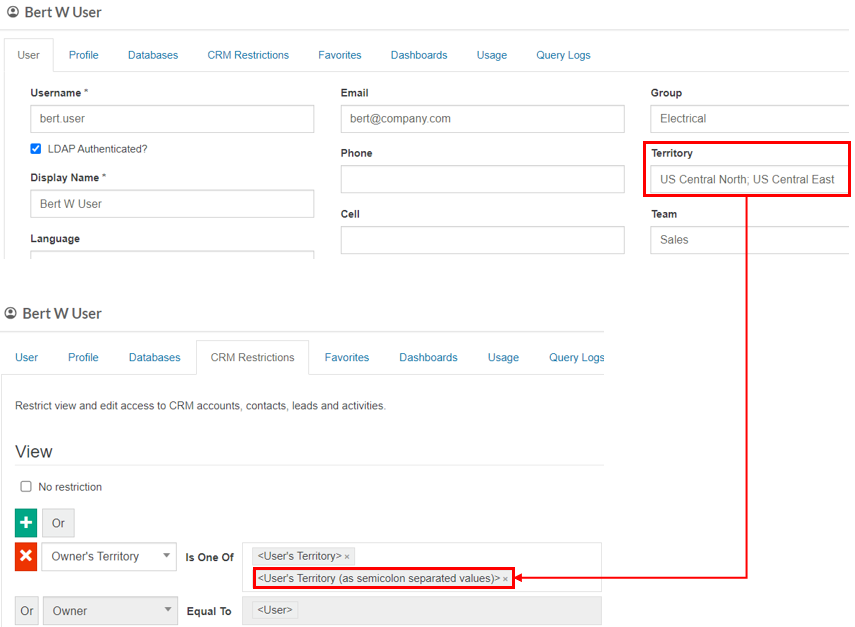
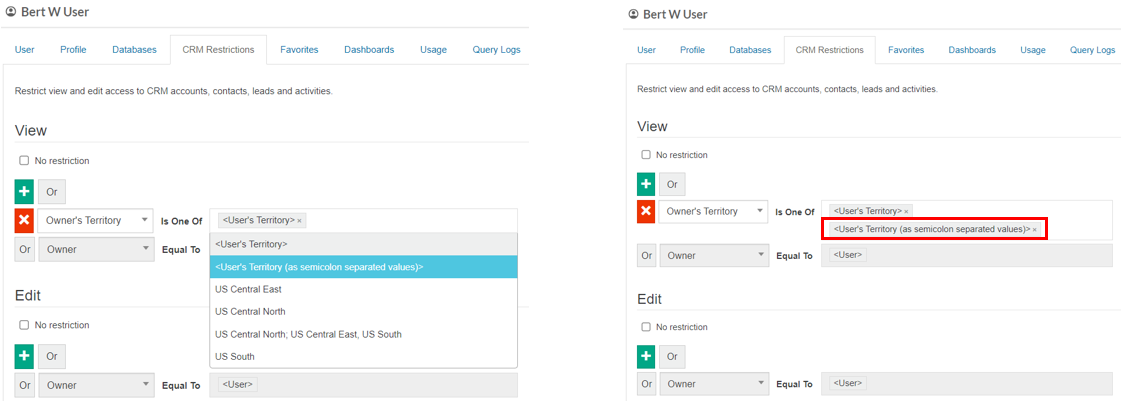
Multiple values (dynamic)
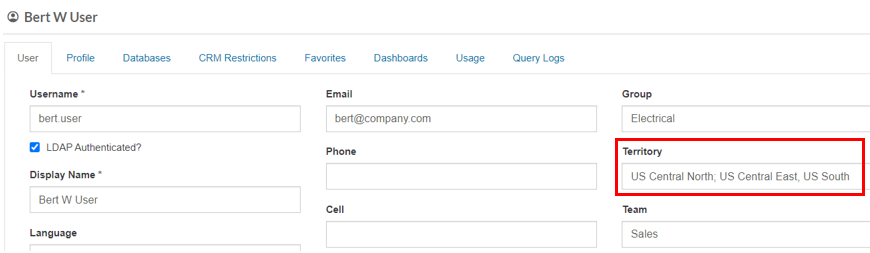
Use the Group, Territory, and/or Team settings on the User tab to drive the restrictions. Add multiple groups, territories, and/or teams to the user’s maintenance form separated by a semicolon and select the …(as semicolon separated values) option in the rule.
This model is suitable for larger organizations that likely have a more complicated hierarchy because:
The set-and-forget approach reduces the need to manually update restrictions for each user.
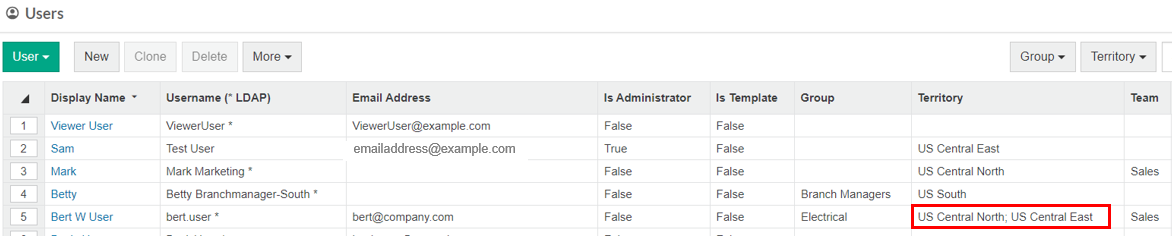
On the Users page, it is easier to see at a glance who can access what, which is handy when you have hundreds of users.
| Expand | ||
|---|---|---|
| ||
Suppose Bert the sales executive is training new sales executives across the country, therefore, you want to allow him to view the CRM entities in multiple territories. You want to update this access from time to time without having to edit Bert’s restriction rule each time. You also want to have an easy way to see which territories Bert currently has access to view.
|
Remove all restrictions
Removing all restrictions gives the user full access to all the CRM entities. This action is suitable for administrators and users who require a broad level of access, as they typically need to view and edit all CRM entities.
Open the user’s maintenance form, click the CRM restrictions tab, select the No restriction checkbox, and click Save.
On this page
| Table of Contents | ||||||||||
|---|---|---|---|---|---|---|---|---|---|---|
|