A user's profile determines what they can do in Phocas. The The simplest way for you (Administrator) to assign a profile, and also the easiest to manage, is to select a default profile. However, if you have permission, you can create shared profiles that can be applied to multiple users in your organization. You can also create a user-specific profile for an individual user.
The Profiles page displays a list of all the available profiles, including the default profiles and any other profiles that you or other administrators in your organization have created. These profiles are available for selection on the user maintenance form.

The following table lists the default profiles and describes what they allow a user to do:
Profile
What the user can do
Basic
to enable permissions for a user is to assign them one of the default profiles:
Basic - Users can perform most standard queries in Phocas, and save a personal favorite or dashboard.
Advanced
- Users can perform most queries, except for month-to-date. They have the same saving permissions as the Basic profile, plus permission to share and subscribe to dashboards and favorites,
and export via clipboard, which allows copying and pasting from the grid.
Administrator
- Users have most of the functionality in Phocas.
Viewer
- Users can view favorites and dashboards
shared with them and see the homepage, but not open those dashboards or favorites to analyze the data, nor access any databases.
Note that this profile has been simplified from earlier versions of Phocas, and some users with this profile will be able to do less in Phocas than they previously could. If you want these users to have extra functionality or access, you can either assign them a different profile or edit their individual
permissions.
Blank
(no profile selected) - Users can view and open favorites that have been shared with them, but not access any other functionality.
In addition to the default profiles above, you can create your own (shared) profiles that can be applied to multiple users in your organization or create a user-specific profile for an individual user.
The Profiles page displays a list of the available profiles, including the default profiles and any other profiles that you or other administrators in your organization have created. These profiles are available for selection on the user maintenance form.

Assign a profile, copy a profile, or create a user-specific profile
When you are setting up an individual user account, you have the option to apply a default or shared profile , or create a user-specific profile where you customize the settings for that user. If you have advanced permissions, you . You can also copy the settings permissions in one user's profile directly into another user's profile. This option , which will save you time when creating new user accounts, as you can copy another user’s profile, then make adjustments to the settings rather than starting from scratch.
Click Administration > Users.
Locate the user and click their name to open the user maintenance form.
Click the Profile tab. If a user has a viewer license, the Profile tab on their user maintenance form is unavailable.
Click the Phocas menu button > Administration > Users.
Locate the user - either browse the user list or search for a specific user.
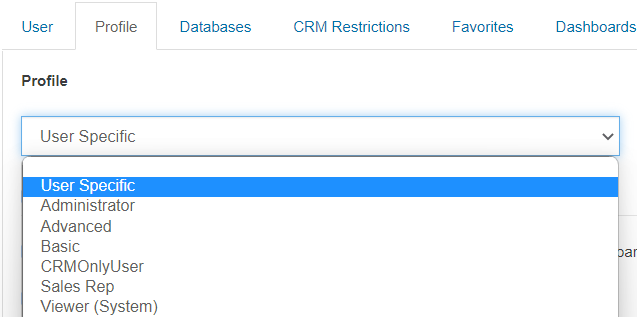
Click the user’s name to open the user maintenance form.Click the Profile tab and click the dropdown list, then eitherselect the applicable option from the list:
Apply Select a default or shared profile: Select the required profile from the list.
 Copy a profile from another user:
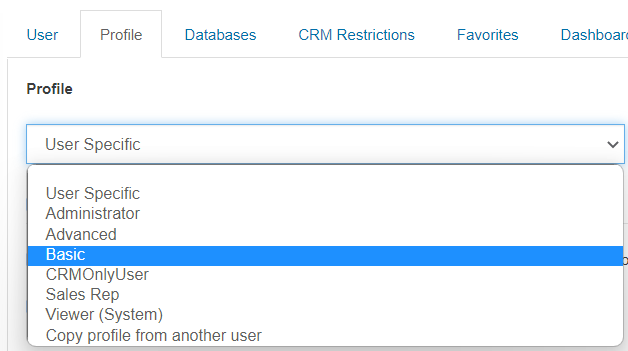
Select the Copy profile from another user option from the list, then select the user whose profile you want to copy and click Copy.
 Create a user-specific profile for this user:
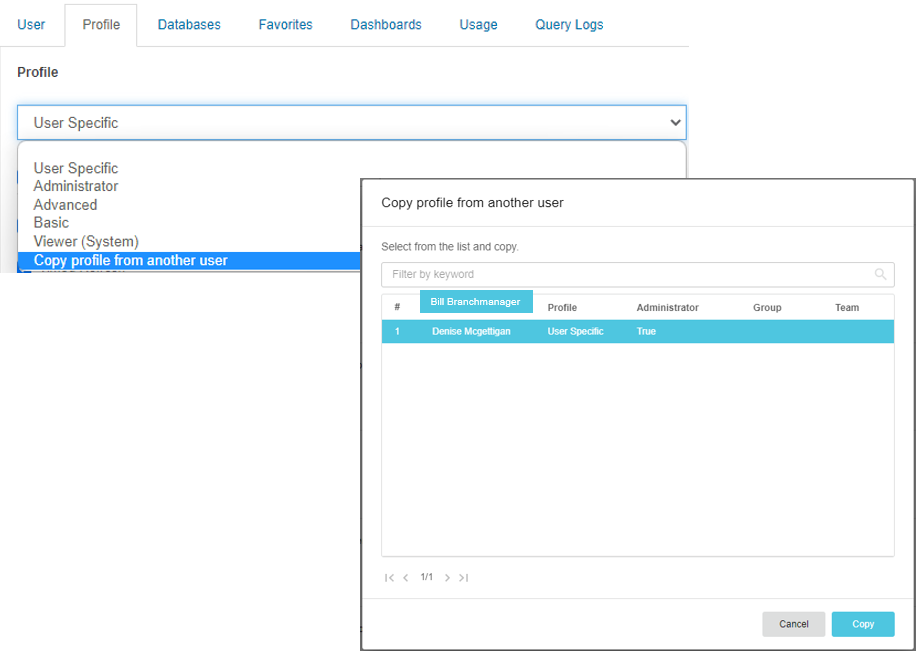
Select the User Specific option from the list, then proceed to select the relevant setting checkboxescheckboxes of the relevant permissions underneath.

Click Save, then click Close.
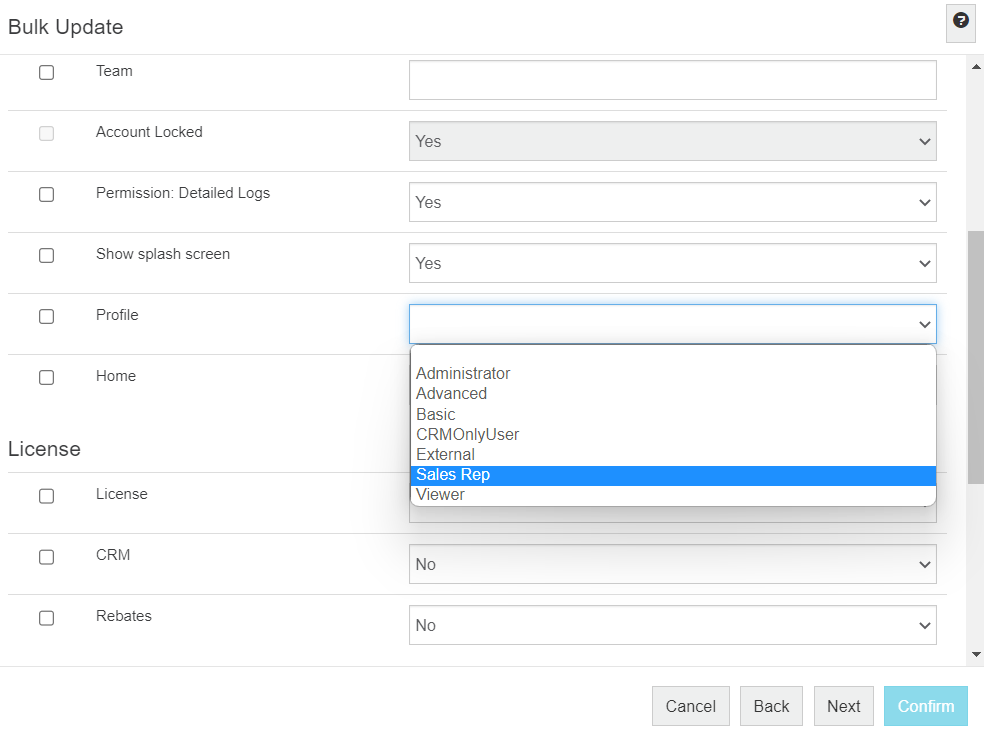
Assign a profile to multiple users
You can save time by assigning a profile to multiple users at the same time using the Bulk simultaneously using the Bulk Update tool. On the second Bulk Update screen, select the required profile from the Profile dropdown list. See Update users in bulk for more detailed information.

Edit a profile
You can edit the composition of a profile to customize the settings for your organization’s needs. You can either start this action from the Profiles page or use the shortcut on an individual user’s Profile tab. The latter option is handy when you are editing the profile of a single user who has been assigned a shared or default profile and you also want to edit the settings in that profile, without losing your work on the single user’s profile screen.
On the user maintenance form, then click the Profile tab.
On a user’s Profile tab, next to the Profile dropdown list, the Edit for everyone link
. The profile page opens in a new browser tab, where you can proceed to edit those profile settings for all users. You can return to the other browser tab to continue editing the single user’s profile settings.
displays. This is a shortcut to edit the configuration of the profile. See Manage Profiles for more information.
On this page
| Table of Contents | ||||||||||
|---|---|---|---|---|---|---|---|---|---|---|
|
Related pages
| Panel | ||
|---|---|---|
| ||
Videos |